If you ever wish to change the boundaries of a map you have created in the past, this guide can help you view, edit, and save over your old map zone.
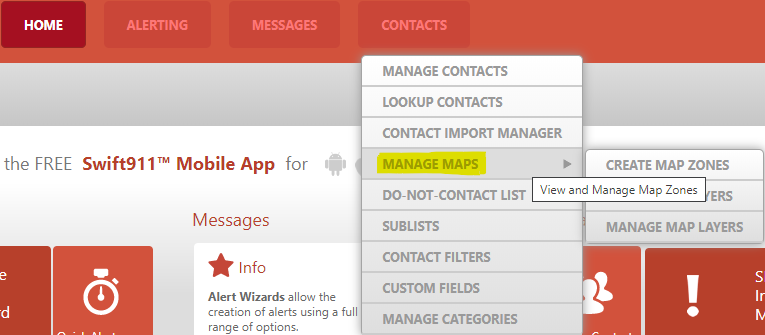
1. From the Home page, hover over “Contacts” at the top of the screen and click directly on “Manage Maps.”
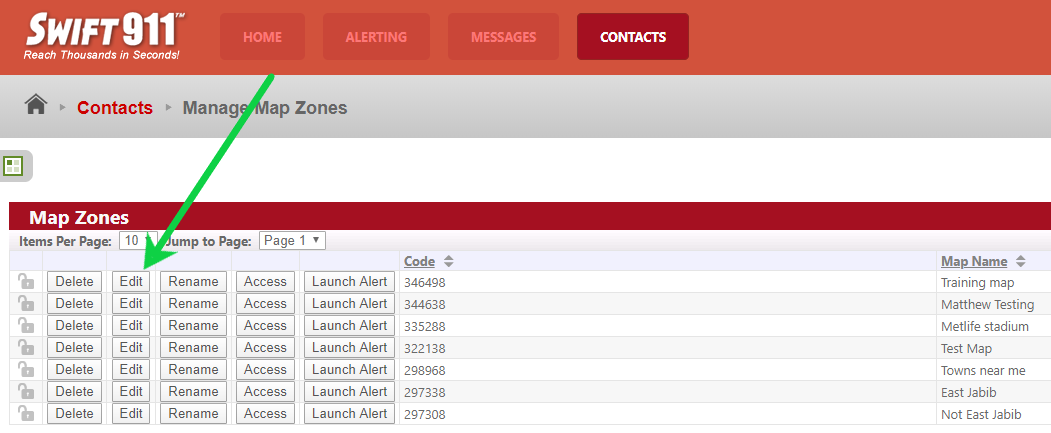
2. Click “Edit” next to the map you would like to make changes to.
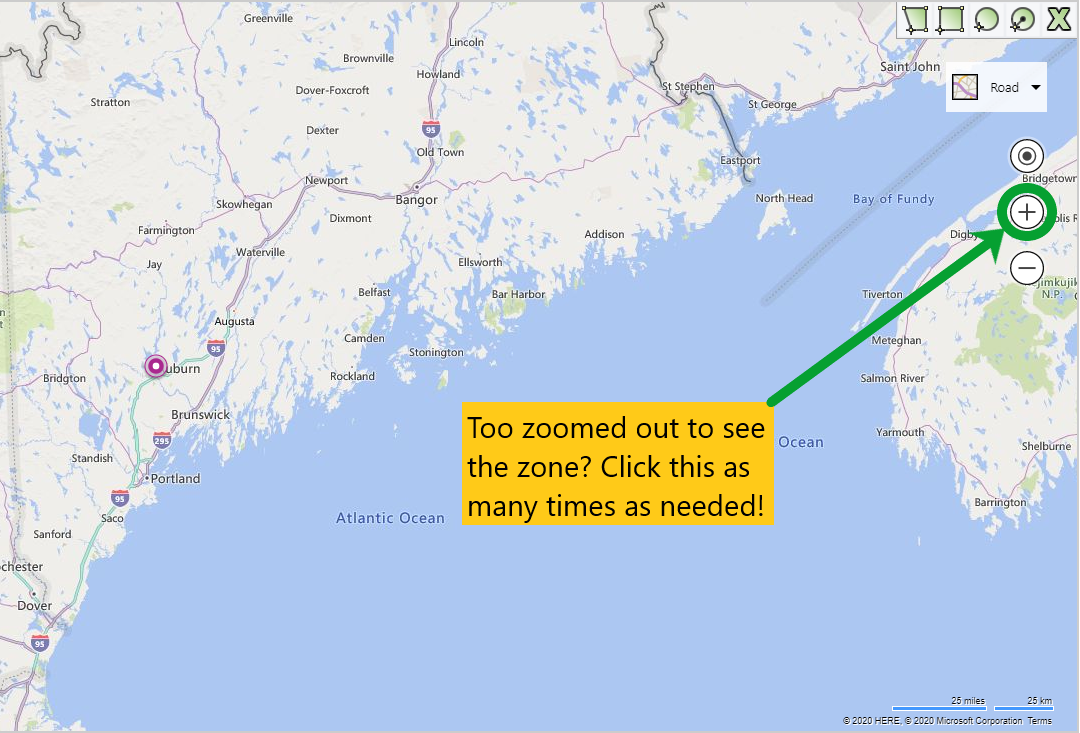
3. You may only see a purple dot and be far zoomed out. If this occurs, you can click the “+” button to zoom in on the purple dot until the green map shape is covering most of your screen.
4. Click anywhere in the green zone (but not the purple dot inside) to reveal the vertices of the map shape.
| Before clicking in the green area | After clicking in the green area |
5. Now, you can click and drag any of the existing vertices to new locations to expand or shrink the covered area. The system will keep the shape closed for you upon moving any vertex.
-
- You cannot add additional vertices to an existing shape, but you can have more than one shape in a map zone if you need to cover more area.
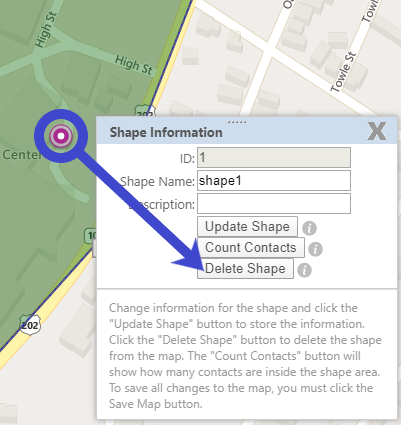
- If you feel the need to remove a shape, you can click on the purple dot, and then “Delete Shape” to remove it from the map zone.

- From there, you can leverage one of the drawing tools on the upper left of the map. We recommend the polygon tool all the way on the left for the most flexibility when drawing the zone.
6. Once the vertices and/or shape(s) have been modified to your liking, you can click on Save Map, followed by Update Map, to save your changes.