In addition to your usual contact lists, you can create what are known as “List Groups.” A list group allows you to assign contact lists, so when you send an alert to the list group, every contact in every assigned list would be able to receive the alert. This guide is designed to show you how to create a list group.
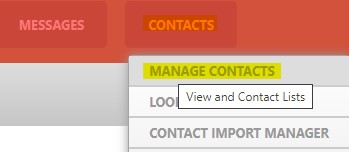
Step 1: From the Home Page, hover over "Contacts" and click “Manage Contacts.”

Step 2: Click on “+ Add List Group.”

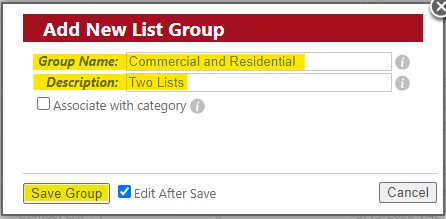
Step 3: Type in a Group Name and Description (optional), then click “Save Group.”

Step 4: Click “+Assign Lists” over on the right.

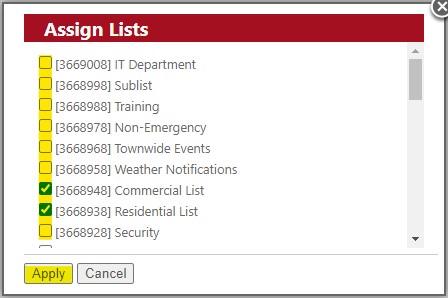
Step 5: Check the box for every list you would like to assign to this list group, then click "Apply."

That’s it! If you need to remove any lists from the list group, just click “unassign” next to the list to do so.
