This guide is designed to walk you through the process of adding a new user in Swift911, and providing them with the access they need to use the system as intended.
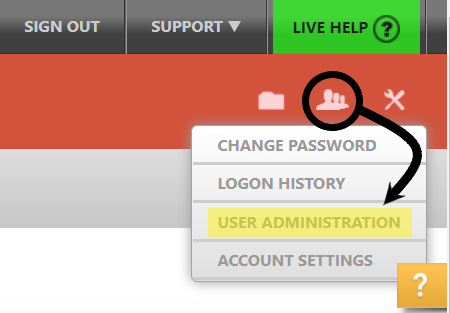
Step 1. Click on the Account Management button (or as we like to call it, "The icon with three heads!"), and then click on User Administration.
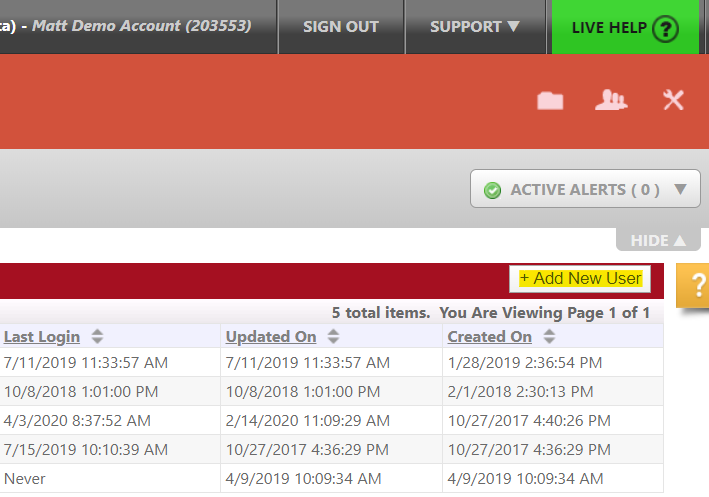
Step 2: Click on the "+ Add New User" button on the right side of the screen.
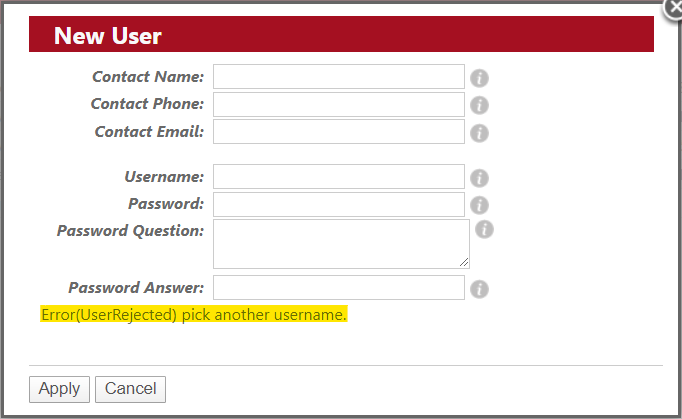
Step 3: Fill out the New User fields as prompted.
- The Contact Email determines where reports for alerts, launched from this user, are sent to.
- The Contact Email also determines which email a reset password would be sent to.
- Password should be a minimum of 7 characters, 1 upper, 1 lower, and 1 number or special character
- Username should be under 20 characters and must be unique across all Swift911 users. More on this in the details below...
- The password question/answer fields are optional. They are used for self-password recovery.
When finished with your selections, click "Apply."
Note: If the new user does not appear among the list of users after clicking the Apply button, then it is likely that the username you chose is already in use by another Swift911 user. Click on the "+Add New User" button again to confirm. You should see a new message there that says "Error(UserRejected) pick another username." Filling the form with a different, unique username will resolve this.
Step 4: Click User Roles next to the user you just created.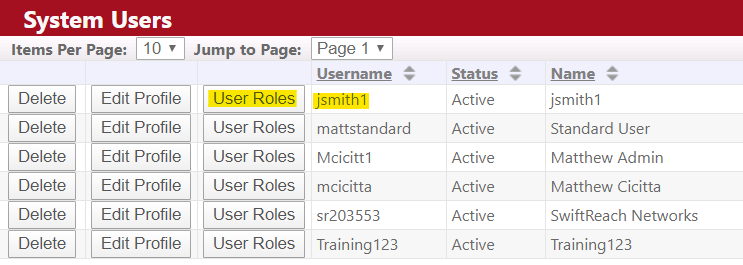
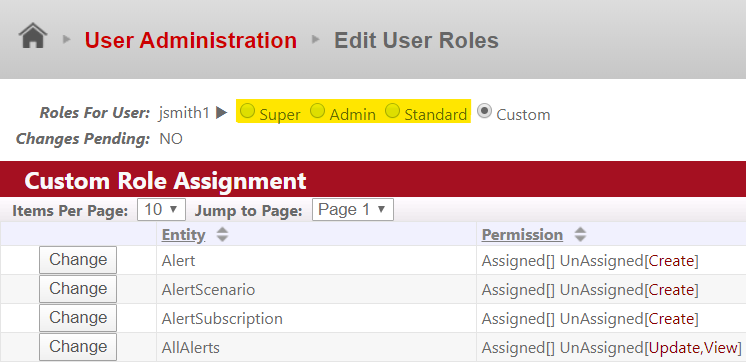
Step 5: Apply the desired user role
| User Role | Description |
| Super | Access to everything. We recommend a limit of 1 per account other than the SR user (support account used for troubleshooting only). |
| Admin | Essentially the same access as the Super, except they cannot give other users Admin level access. |
| Standard | Unable add new users, can only access lists and messages that they have been given access to by an Admin or Super, or created themselves. |
| Custom | Heavily customizable user access. Only necessary for users who need very limited access. |
Step 6: Click "Save Changes."

Your user is now ready to log in! You'll just need to let them know where to log in (https://swift911v4.swiftreach.com/Account/Login.aspx), as well as their username and password.