This guide is designed you walk you through creating an SMS/Text message through Swift911, which will allow recipients to respond, and for the user to see the responses in the resulting report.
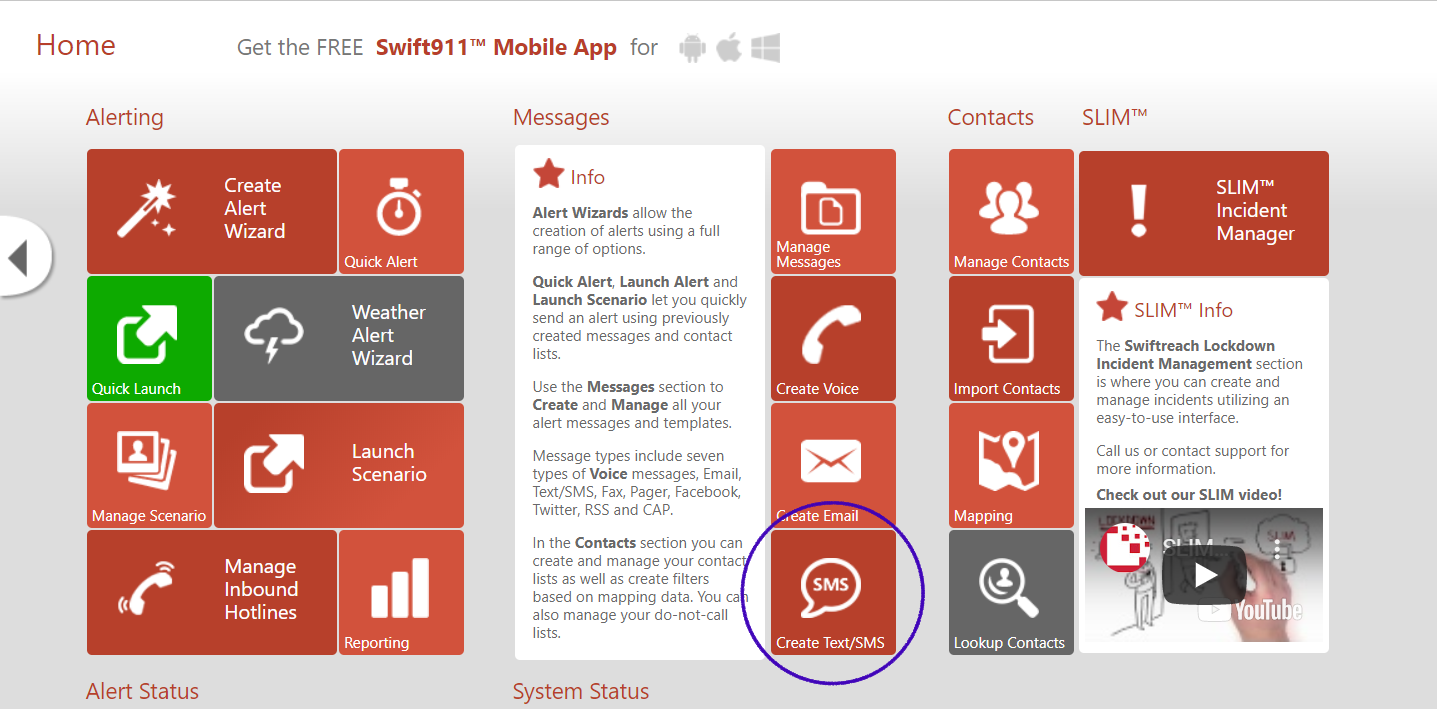
Step 1: From the Home page, click "Create Text/SMS."
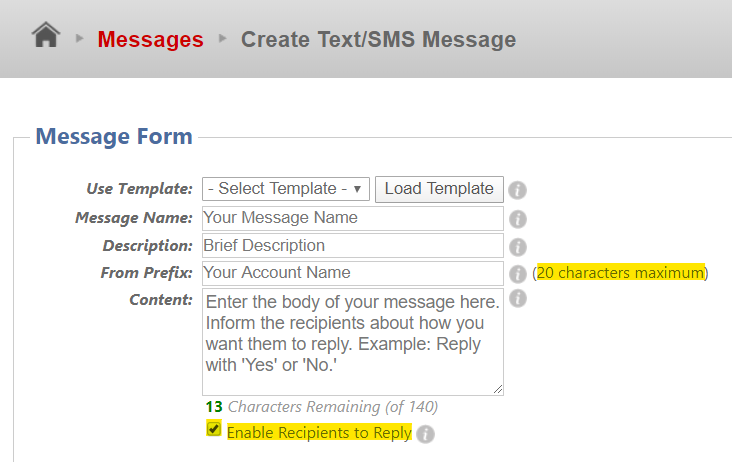
Step 2: Create the text message.
Fill in the following:
- Message Name
- Description (optional)
- From Prefix (20 characters maximum)
- Content (140 character limit)
Click “Enable Recipients to Reply.”
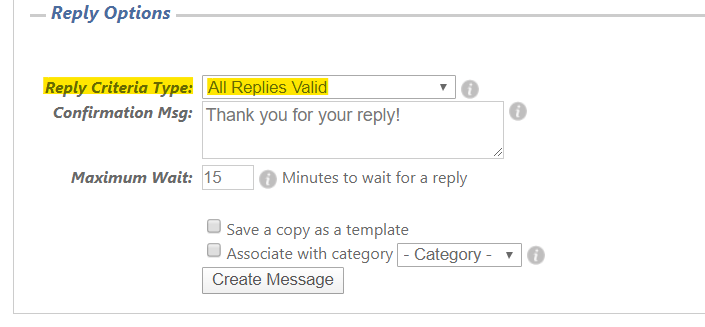
Step 3: Select reply options
Reply Criteria Type: Change to All Replies Valid (highly recommended).
Confirmation Msg: Recipients will receive this if they reply to the text.
Maximum Wait: How long the system will accept and record responses.
Click "Create Message" at the bottom to save your new message.
Now that you have the message created, you can launch it through the...
1. Create Alert Wizard (Alerting -> Create Alert Wizard), or
2. Quick Launch (Clicking the Launch Alert button found in Messages -> Manage Messages -> SMS Tab, next to the message you created).
Once the message has been sent, you will get a report that will tell you which numbers should have received the text message.
However, by the time you get the report, not all of the responses will necessarily be there, as you gave recipients time to respond based on the Maximum Wait Time chosen in Step 3. Here is how you can take a look at all of the responses that have been recorded from your SMS message.
Step 4: After the Maximum Wait time has passed since you sent the alert, hover over Alerting and
click on “History and Reporting.”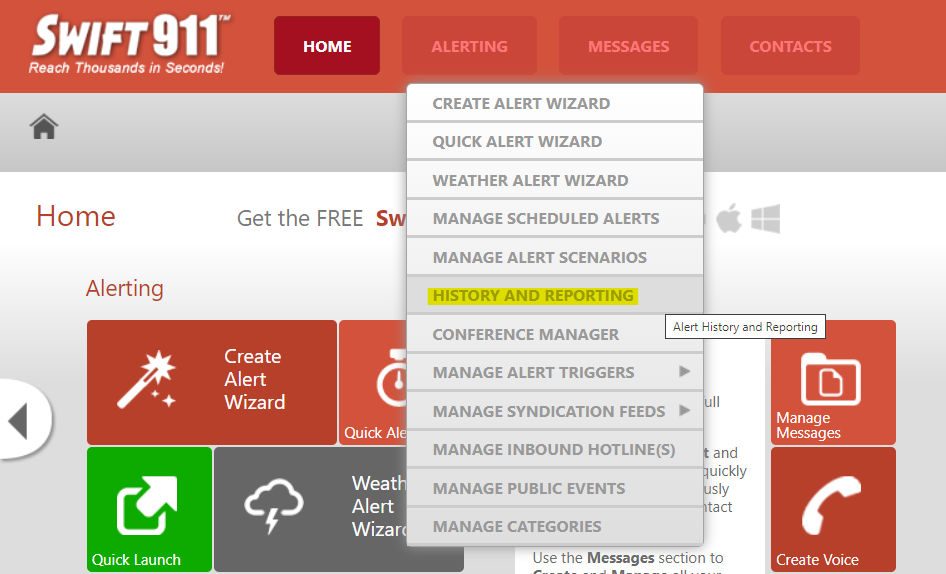
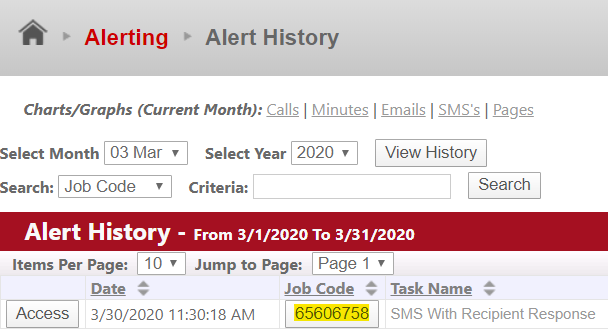
Step 5: Click on the Job code associated with your alert, use the date and/or the name of the alert to guide you.
Step 6: Click on “All SMS Records”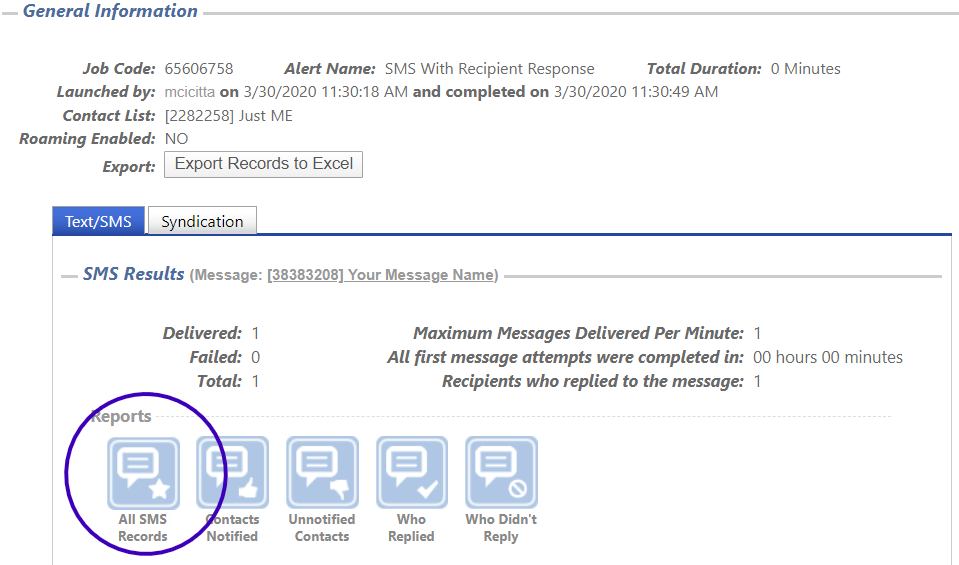
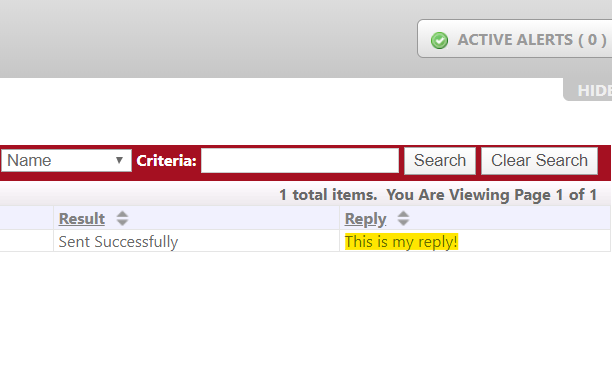
Step 7: Recorded Responses will be all the way on the right.
Please note that while you will receive a report via email with a few of the responses, the best way to see all of them is to wait until the maximum wait time expires (a value set in step 3), and then complete steps 4 and 5 of this guide. From there, you can complete step 6 as normal OR use the “Export Records to Excel” button from the image under Step 6 to email yourself a report with all the responses.